Aligning In-App Guide Tooltips with End-User Application
When designing in-app guide tooltips in HelloApp Studio, ensuring perfect alignment with your end-user application can be challenging. Consistency throughout the UI/UX is critical for building an engaging and user-friendly platform.
HelloApp Studio simplifies this process, allowing you to align your in-app guide tooltips with ease. Our intuitive interface makes it straightforward to position your tooltips exactly where you need them. Say goodbye to tedious trial and error, and hello to a smooth and consistent UI/UX.
Setting Application Options for Better Position Editing
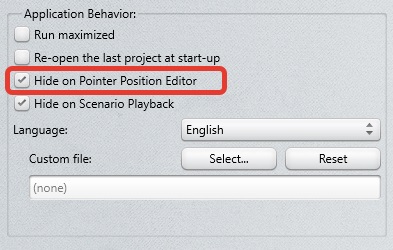
Before editing the position for the in-app guide tooltip, be sure to activate the “Hide on Pointer Position Editor” option in the application settings under the “Application Behavior” group. This feature hides the HelloApp Studio window while you position the tooltip in your end-user application window, making it easier to see and place the tooltip accurately.
Available Positions for In-App Guide Tooltips
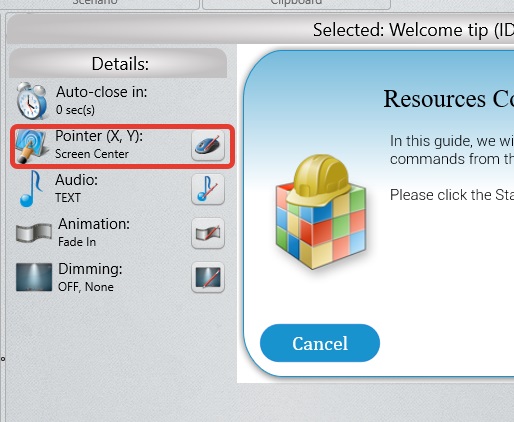
To position the in-app guide tooltip, click the “Edit position”button under the “Details” panel.
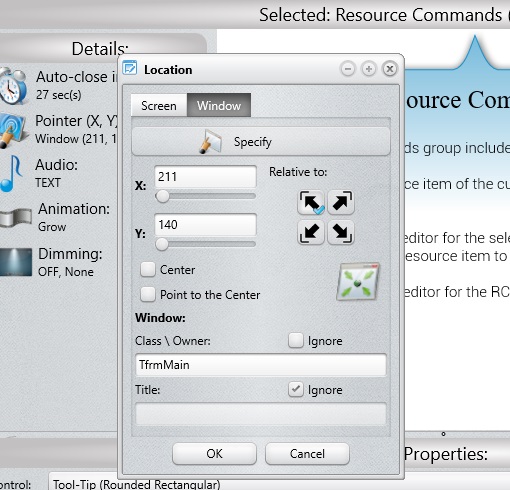
HelloApp Studio allows you to position tooltips relative to either the screen/desktop or the application’s window.
Tooltips can point to specific coordinates or be centered on the screen or window. Activate the “Center” option to display the tooltip in the center, or use the “Point to the Center” option to have the tooltip’s pointer aim at the center of the screen or window.
Positioning In-App Guide Tooltips Inside the Application's Window
To position your tooltip relative to the end-user application’s window, switch to the “Window” settings by clicking “Window” in the dialog. Run your end-user application and open the window where the tooltip should point. Click the “Specify” button to hide the HelloApp Studio window and activate the “Click Editor”. Clicking on the desired point in the application window will set the tooltip position, and the HelloApp Studio window will reappear.
The Editor will automatically detect the X and Y coordinates of the click and the window details. Window details include Class (Owner for MacOS) and Title. In some cases the Title of the window could be changed at run-time. So we can ignore it in such case and just use the Class settings. To ignore Class or Title just activate the respective Ignore option.
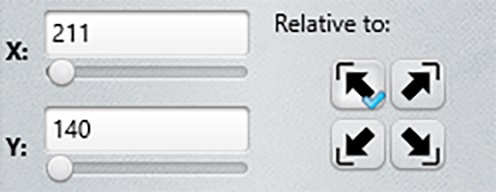
Anchoring In-App Guide Tooltips
Proper anchoring ensures your tooltip always points to the correct part of your end-user application. Use the “Relative to” buttons group to anchor the tooltip to the desired window corner:
Upper-Left
Use this anchor if the target window won’t resize at runtime or if the target control’s position remains constant upon window resizing.
Upper-Right
Use this anchor if the target control is bound to the top and right edges of the window. Examples include right-aligned menu items and UI elements like “hamburger menus”.
Bottom-Left
Use this anchor if the target control is bound to the bottom and left edges of the window. Examples include the Exit button in HelloApp Studio and left-side aligned status bar panels.
Bottom-Right
Use this anchoring option when you need to point to the controls aligned bottom-right in application’s window. Examples of such controls are right-aligned status bar panels and buttons, like in Windows Explorer.
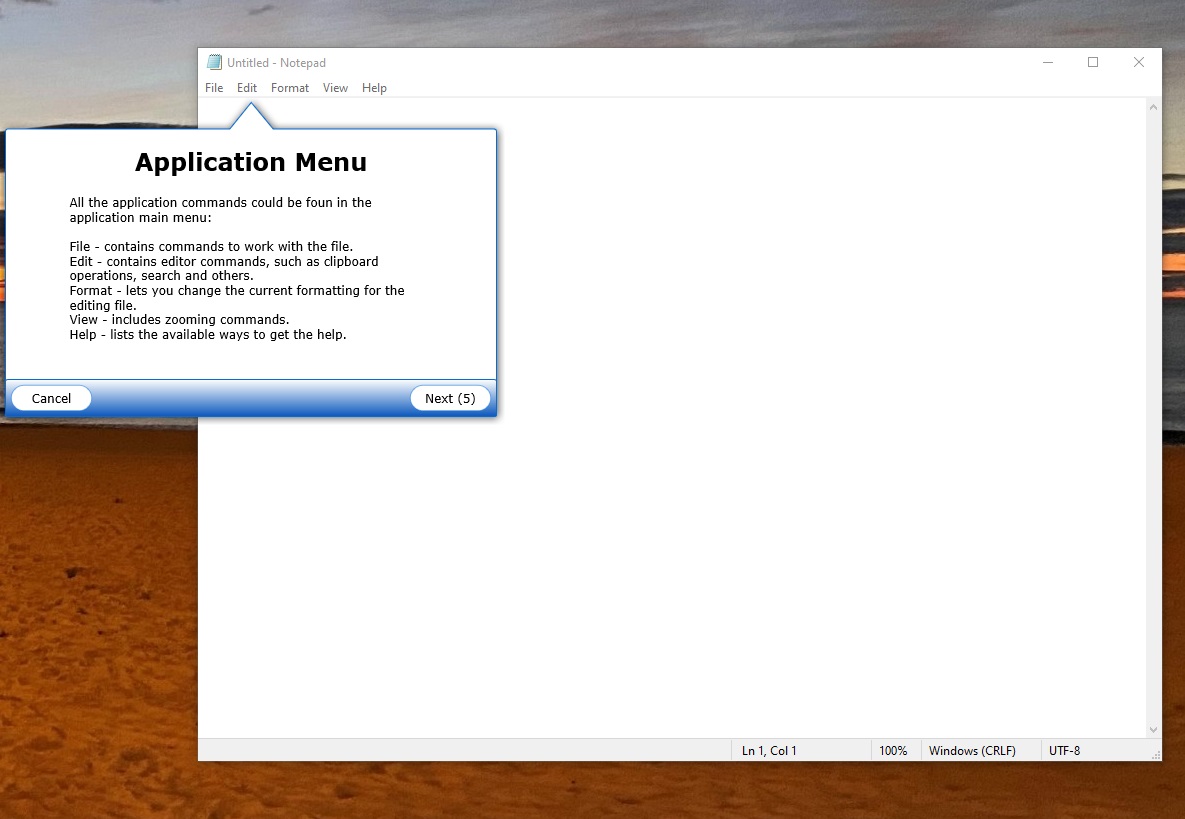
Example project
Explore the Examples folder in HelloApp Studio (or the HelloApp Studio Welcome page) to open the NotepadExample.haproj sample project. This project demonstrates how to align in-app guide tooltips with various elements of the Notepad.exe application.
Ensure Notepad is running to see the sample in action.